
Like the post title says, this is a tutorial of sorts for a freezer paper transfer and for homemade chalk paint...try these techniques at your own risk...read on and you'll see what I mean.
Here's Part One of a recent 'inspired' project:


This started out as a dark wooden wall box thingee. I sanded it down (along with some cheese plates - that's another post), ready for some paint.
I tried my hand at some homemade chalk paint - three shades of it: cream, lilac, and yellow. Since I'm
One tip that seems to work well is to dissolve the baking soda in water before adding it to the paint - it makes the paint smoother, but still has the same sanding properties. Anyway, back to the box thingee...
 |
| Painting like crazy on one of the last warmish days in Michigan! |
See that yellow thing on top of the paint can/on top of the box/on top of the table? Well, that's the painted box. Painted with some buttery yellow oops paint (thank you Home Depot! Oh, and this post isn't sponsored by HD - I just end up there every other day, but I digress, as usual). Which was made into homemade chalk paint. Which was painted over a lovely lilac homemade chalk paint. So the lilac would peek through after distressing. Except for one thing...
After sanding the lovely, buttery yellow...it turned into a horrible, putrid chartreuse color. It truly was awful and thanks to the magic of paint, it was quickly repainted back to lilac. Whew!
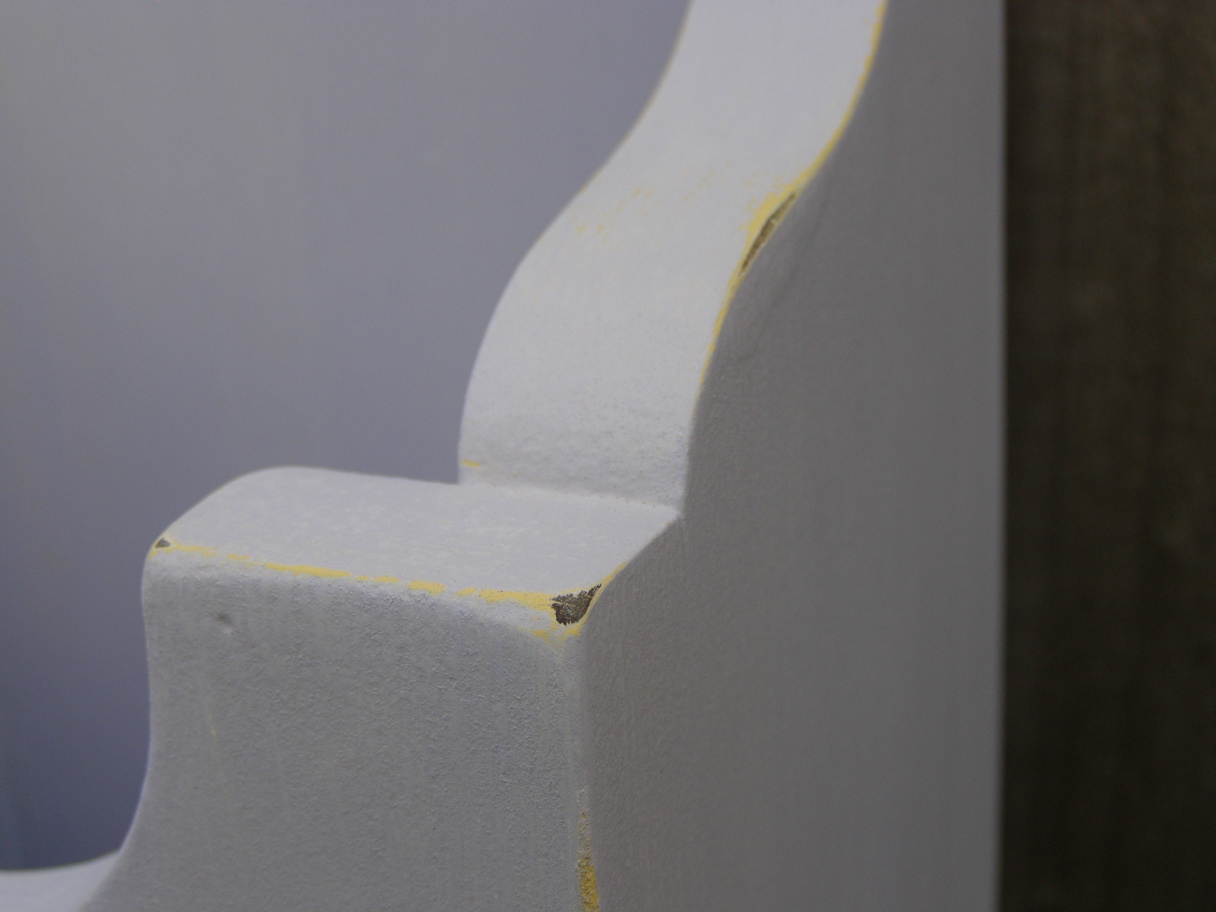

With distressing, the yellow shows a little but isn't obnoxious. But the box needed something...
Part Two of this post:
One thing that I'm always on the look out for is a good transfer method. Overhead projectors, carbon paper, homemade carbon paper, citra-solve - there are many methods out there and I've tried a few with ok results.
That's why I was excited when I read about a method using freezer paper and an inkjet - both of those things I already had! I used freezer paper for my curbside table stencil and it worked ok, but this was for a transfer of a detailed image.

Wreath image compliments of The Graphics Fairy. I added the text on Picnik.
I read the directions: adhere freezer paper waxy side out to a sheet of paper. Print out your image, place it where it's to be transferred, burnish with a spoon, and instant detailed image. Easy, right?
Well, late at night is not the time to be trying new projects.
- I forgot to mirror the image with the text; fail.
- I didn't use spray adhesive to glue the freezer paper to the regular paper (the first time); fail.
- I thought I remembered the directions, but forgot about dampening the wood before placing the image on it; fail.
- I was able to wipe off the backwards text, properly adhere the freezer paper with spray adhesive, print out new text, dampen the wood...and smeared it completely; fail.
Part Three:
After a few days of not thinking about this at all, it was time to try again. I almost gave up and stenciled the project, but
Image of properly adhered freezer paper, with a properly mirrored image:
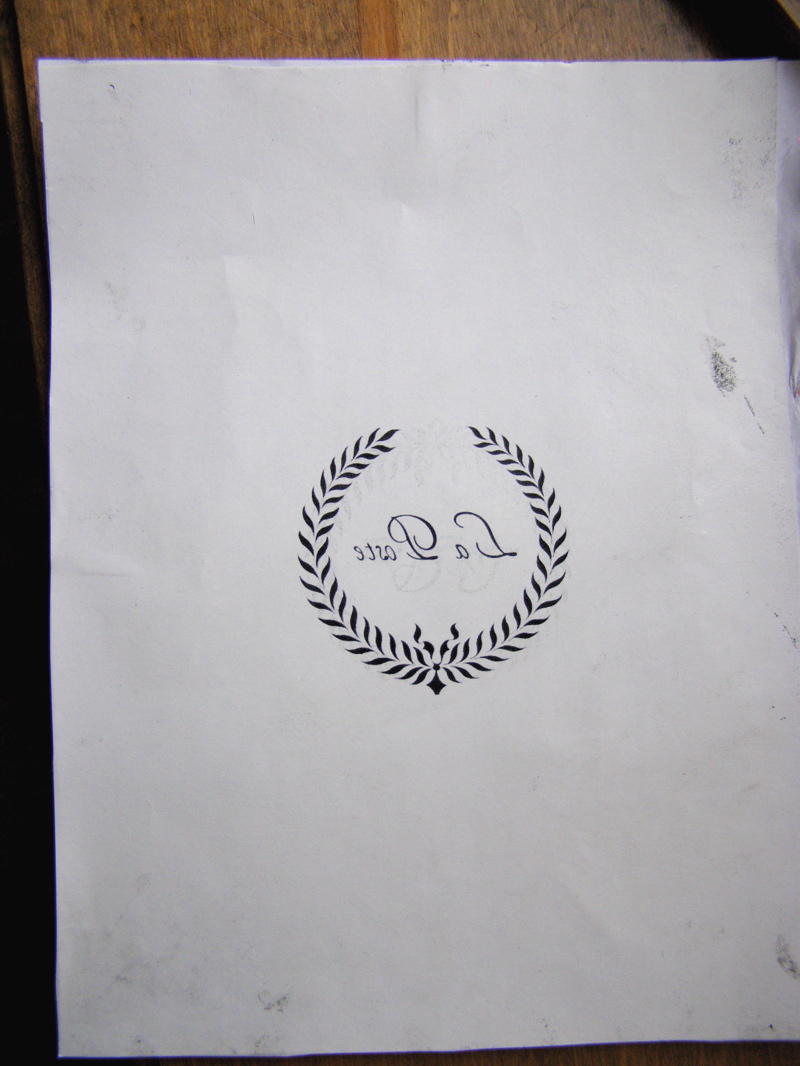 |
| You can see that this paper has been through the printer a few times because of my mistakes...it wipes off, but leaves a ghosted image. Seems to be fine though. |
Now it's very important to not move the image around or you'll get a smeary image. Trust me on this one (see above...way above...like in Part Two of this obnoxiously long post...).
Here is the transferred image:
 |
| With dampening, the image turned out much darker than my first try. |
 |
| It smeared just a little in spots, but a dampened q-tip cleaned up those areas. |
 |
| Best shot on a cloudy day - sorry it's tilted, but this is the only way I could get the whole box in the light. |


And see that picture of my and my hubs? It's a pretty funny story about how that all happened...maybe I'll tell ya sometime.
Here are a couple of thoughts on the transfer method and homemade chalk paint:
- Mixing the baking soda with water before adding the paint makes the paint much smoother, but doesn't affect the chalky qualities of the paint. I did try it without dissolving the baking soda in water first, and the paint was very thick and lumpy. Makes for more sanding. Just sayin.
- Putting the image on a transparency would've been a good idea for placement - will try that next time...and no sticky mess with spray adhesive - bonus!
- Dampen where you need to transfer, but be careful not to get it too wet or the ink will just smear.
- Putting the transfer onto chalk paint doesn't leave a perfect transfer because chalk paint is a bit textured to begin with; transferring to a smooth surface would leave a better impression. If you're going for a distressed, old-ish look anyway, then transferring onto chalk paint is fine.
- Make sure you let the transferred image DRY before touching it!!
- Make sure you don't seal it with anything water-soluable or it will smear!! Use an oil-based sealer and test it on another piece first just in case.
Knick of Time Tuesday Party
Boogie Board Cottage Masterpiece Monday
The Idea Room
A Picture is Worth 1,000 Words 2nd Time Around
Blue Cricket Design's Show and Tell


Seriously smashing, Jill! Just smashing. Perseverance, baby!
ReplyDeleteThanks for sharing your "fails" too...I have lots of those! I have been wanting to try both of those techniques also...thanks for paving the road for the rest of us.
ReplyDeleteReally great transformation! Homemade chalk paint and using transfer paper are two things I've been wanting to try for myself! Thanks for your tutorial!
ReplyDeleteBlessings,
Janet
In the end, it turned out lovely, Jill! I've had my own epic fails with different transfer methods; always so happy to find out about them, though. I've got a new thing I'm going to be trying and if that works out, I'll do a post on it. I'm so glad you shared the ups and downs of this project. Sometimes people think everything always turns out perfectly, but I think we need to share the failures as well as the successes.
ReplyDeleteWonderful tutorial, I've got to try this! I'm your newest follower!!!
ReplyDeleteHappy Thanksgiving!!! Aimee @ ItsOverflowing.com
I've added your post to my Many Ways of Chalk Paint post
ReplyDeletehttp://avintagegreen.blogspot.com/2011/10/many-ways-of-chalk-paint.html
Yours is the first I've seen with baking soda.
-Joy
It came out beautifully. Thanks for tips, eventhough I am not sure that I will use it any time soon, but at least I know where to come looking if I ever need anything.
ReplyDeleteVery nice.....I like it!
ReplyDeleteReally great transformation! Love!!!!!!!
ReplyDeleteHow wonderful this turned out! Thanks for the tips! I haven't tried to transfer images yet but have been wanting to!
ReplyDeleteAnd thanks for the chalk paint tips. I've tried the calcium, grout, and most recently the Plaster of Paris (which I think works best for me) I never thought about baking soda. I'll have to try that next :)
it ended up turning out beautiful, thanks for the tips on the diy chalk paint!
ReplyDeleteLove how it turned out! I have several wood items painted just waiting for the next step. Your tutorial will be helpful, for sure! New follower via Funky Junk Interiors.
ReplyDeleteYou poor girl! But congrats on not givin up and ending up with a beautiful project! Thanks for sharing your trials and errors with us, Jill. It truly helps us rookies! :) Just think, next time it'll be a breeze! lol!
ReplyDeletexoxo laurie
I'm so glad that you persevered and told us all about it. Great tips. Super cute box. Oh- and now you just have to tell us the funny story. :-)
ReplyDeleteYou are so funny! I love how you tell things! Thanks so much for being real. So many blogs seem "unreal". Thank you for sharing your real life experiences with us. I'm your newest follower.
ReplyDeleteYour recipe for chalk paint worked beautifully! My girlfriend & I decided to do some painting tonight & we followed your tutorial for the chalk paint & were amazed. The paint was thick & creamy & in no way at all clumpy. We did disolve it in the water like you said and I think that was the trick. It went on smooth and only had a slightly 'sandy' feel to it when it dried. I only used a very fine buffing block to distress it and it smoothed it out sooooo beautifully. I have NEVER had such satiny smooth results as I had with this. We only mixed up one cup of paint total and painted 4 shelves, 2 baskets, 3 sconces, & a frame! We are in love with this 'new' paint & wanted to say thanks for providing such a great tutorial for all of us. I've read several posts on DIY chalk paint & have seen many comments on the thickness, grittiness, or uneven coverage that can sometimes accompany it but I think maybe baking soda AND dissolving it in water first might be the trick? Whatever it is, It works! It also adhered beautifully. There was no chipping, peeling or scuffing of the finish. We are already planning more painting projects with our 'new paint!' Thanks again for an awesome recipe.
ReplyDeleteCan you tell me how you would use a wax on chalk paint after you transfer the image? I see you used a sealer, but is that needed if you use a wax? Love your final result
ReplyDeleteThanks Anonymous! The wax is the sealer and I used a very light touch on the image area. Seems to have worked well if you don't mind a little fading of the image.
Delete