Showing posts with label glaze. Show all posts

Friday, December 16, 2011

Sheet Music Display Cubby

I can't believe it's so close to Christmas! There hasn't been any decorating at La Maison Junky, but lots of projects are getting done :)

Since there is still lots of sheet music on hand, I figured I'd make another display/cubby/tray/shelf thingee as they turned out nicely in white and black. These little wood shelves are in every thrift shop -when you see the after, bet you won't pass them up next time!


For you photo skimmers - here's a little close-up luv :)
Sheet music looks fantastic as a backdrop for just about anything, and here's how this project started out:

Look past the country hearts people!
This got a nice coat of cream paint, distressed, glazed and waxed. I cut out a backing for it the same way I did for my other two trays. It's just that 'wood' panel that pegboard is made of, but is solid. The same 4x8 sheet has been very useful for a number of projects. It's light enough to use as a backing and easy to cut - I use a table saw, but it would probably cut with a box cutter or Dremel tool.

This next step is probably the hardest part of the whole project...and I'm sure I'm making it harder than it needs to be, but this is the way I think it looks best:


Take an individual page of sheet music and line it up within each divided cubby.

oops, that second from left might be a little off...

Then mod podge the individual squares down.


And hope that you lined it all up properly. I do it this way to get the most music displayed; it would be easier if I didn't care so much to show the prettiest design, but it just wouldn't look right to me.


I add handles on the ends to make it into a tray or just for decoration...this package somehow was missing two screws :( I hate that, but seriously who checks to make sure there are enough screws in the individual handle packages? (Me from now on, that's who...this has happened to me more than once!)

Screw and glue the backing onto the shelf, add some cork backing and then decorate!

Making sure the glue has good contact! Oh, and that Mythic paint can? It's a clue to a big project going down...

Some cork on the bottom to project surfaces.
It was an overcast day, so there was no way of getting a good shot inside. Back outside to take advantage of the light...

Look who showed up - Hootie!


And there it is - isn't it purty? Didn't I tell ya? You'll think twice before you snub that homemade-lookin', country-heart painted, bare-wood shelf next time you're cruising the thrift aisles! On second thought, leave them...more for me :)

Wednesday, December 7, 2011

More Spice Rack Luv

One of my recent posts was about how I seem to be collecting these spice racks. This one was at an estate sale, in the basement with all the other unloved items. (I find a lot of stuff in basements!) What I really love about this one is it held really big spice jars (which weren't with the rack) and was half off as it was the last day of the sale.


Here's how it started out (of course I labeled everything but the spice rack...I'm such a dork):


My homemade chalk paint recipe was used with my favorite creamy color and now the rack is a beautiful creamy color, perfectly and lightly distressed, and glazed and waxed.

I wish I had the photo staging skills of other bloggerinas...whaun, whaun. Update: Due to some very nice feedback from my blogging peeps, I have just crossed that negative off! Thank you!


It's going to look so pretty in its new location in my home...which isn't ready for public viewing at the moment.

I'll update you...sometime in the hopefully near future...promise :)


Linking up to the parties on my left sidebar.


Thursday, December 1, 2011

More Antiqued Mirrors

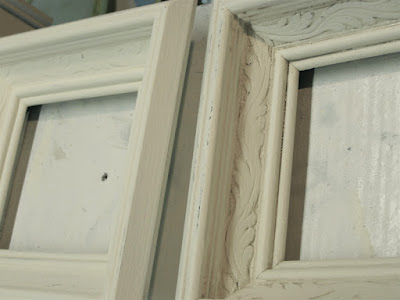
I picked up these frames at the same thrift store as this little spice rack and loved the carved wood insets. Knowing painting and glazing would bring out the detail, I was excited to make them over.


Then I saw the antique mirror tutorials from here and here and gave that a try on this project.  For these mirrors, I actually tried EZ-Off and it didn't really take off the silvering until I used some fine grade sandpaper. One of my readers, Aimee of Twigg Studios, suggested I try lime scale remover and acetone nail polish remover...isn't it wonderful how helpful you all are? ;) And go check out her blog - beautiful!

Here's how they looked at first:


Then they got a coating of homemade chalk paint in a creamy color


Then they were glazed to bring out the detail

See how a little glazing with a brownish tint really brings out the detail?
Then the mirrors got their treatment

Trying EZ-Off and wiping it off on the right...it doesn't work so well

While wet, a little 400 grit sandpaper helped the whole thing along...

...still not quite what I wanted, but with the addition of nail polish remover (acetone) and a lot of scrubbing with fine steel wool, I was able to get the look I wanted.
and some antique sheet music was placed behind the mirrors


Then I tried some fabric


Sorry about the reflection of my lovely garage, but mirrors are tough to photograph!

Pretty, right? It would be even prettier if it didn't reflect my grass and garage, but you get the idea ;)


Linking up to the parties on my left sidebar.


Friday, November 25, 2011

Antiqued Mirror Project

In the interest of being real, one of my recent projects took a couple of tries to get it to where I wanted it to be. Well, how about taking a look at another of my recent projects inspired by other awesome bloggers that didn't end up exactly like I wanted...

Here's the finished Anthropologie-inspired mirror:

Some mirror is still left, some sheet music can be seen - cool, right?
These were my inspiration files:

Vintage Revivals - using muriatic acid for great results

Ramblings of a Gypsy Nomad - using EZ Off oven cleaner

Since EZ Off was already under my sink, that's what was getting used.

The framed mirror was an ornate plastic frame made by Syroco, which made a lot of wall decor back in the 70's. I generally like their pieces as candidates for makeovers and this was no exception:


Painted and glazed and it's already much prettier. Now for the mirror...

I used that orange paint stripper to take off the paint; it's not so noxious and is supposed to be less harsh. With mirrors, there's a layer of paint on top of the silvering that provides the reflective qualities. Be careful with older, vintage mirrors as they may have mercury in them and this would not be a recommended project.

Coated with paint remover
*Note: be careful with metal scrapers - they can scratch; plastic would be better!*

The paint remover was left on overnight...no reason for that length of time other than I got involved in another project...why do one project when you can do 16?? The paint came off just fine, and even a little of the silver at this point. I used a razor blade to scrape off some of the softened silver.

*Note: any scraping works much better while it's wet.*
Didn't even need to get to the EZ Off or acid or anything else. Since the razor blade left a rather hard edge on the scraped off parts (think squares instead of an organic wearing of the silver), I wondered what else would soften those hard edges without scratching the glass. So, out came the extra fine steel wool I use in furniture projects.

A little extra scrubbing and now there were nice worn spots in the silvering. Maybe a little too much, but for my first effort, it looks pretty good.

I mod-podged some vintage sheet music to the backing of the frame. Attaching it to the backing instead of the glass leaves the option to change out the design inspiration.


Here you can see how the razor blade scraping looks


What do you think of this project? Would you try it for your vintage-inspired mirrors? What would you want peeking out of your antique mirror?

I did a few more mirrors actually using EZ-Off for a different look and will update you on those tries soon.

Knick of Time Tuesday Party
Boogie Board Cottage Masterpiece Monday
The Idea Room
A Picture is Worth 1,000 Words 2nd Time Around

 http://linda-coastalcharm.blogspot.com/Transformation ThursdaySomewhat SimpleHookingupwithHoHPhotobucketOne Artsy Mama


Stuff and NonsensePhotobucketFunky Junk's Saturday Nite SpecialUndertheTableandDreamingLink Party


Related Posts Plugin for WordPress, Blogger...