Donna at Funky Junk Interiors had a tool tote tutorial on her site (it was a guest post) and I thought, 'Hey, I like to work with wood, I have a table saw, that doesn't look too hard!' I tend to believe what others tell me, so it looks like a tool tote was being made.
And because I tend to get WAY wordy, here is my post in pictures (with captions, of course).
 |
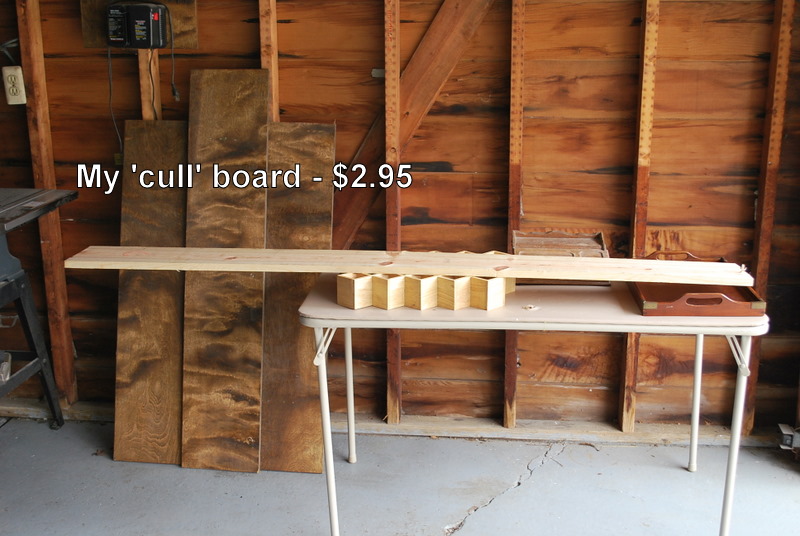
| My $2.98 board from the culled wood pile (on top of other projects...) |
 |
| My detailed design plan for the tote...don't judge |
 |
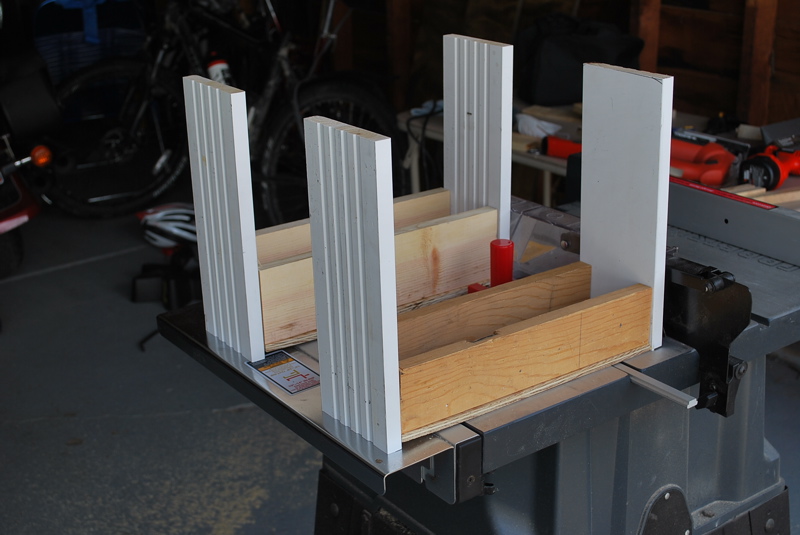
| This is a seriously long tote... |
 |
| Long tote, divided into sections |
 |
| Hmmm....this might be a little heavy |
 |
| 2nd thoughts - cutting down the length |
 |
| It's a 2-fer! (cutting 2 boards at once) |
 |
| A little more manageable size |
 |
| Still divided - see the saw burn marks? Kinda liking them |
 |
| My fancy workbench and tools needed for the project |
 |
| A little sanding... |
 |
| Hmmm...how am I going to actually 'tote' this tote? |
 |
| Simple: I'll make a hole for my hand! |
 |
| My drill was too wimpy; enter big drill bit and jigsaw |
 |
| Now that's a hole (?) |
 |
| I did so well with the hand hole that I decided to curve the edges of the handle cuz I'm silly like that |
 |
| Huh. I'm better at cutting curves than straight lines with a jigsaw. Who woulda thunk? |
 |
| The curves aren't exactly even; sue me |
 |
| Surprise! I stained it and love the look of the dark wood. The stain took really well. That's my special staining brush - it's actually quite awesome! |
 |
| Now what to do with all this extra wood? |
 |
| I know! Make more totes! I had a door jamb piece already - grooves in or out? |
 |
| This was in the directions - taper the ends. See? I'm following directions...sorta |
 |
| Nothing exciting - just glued and nailed the bottom |
 |
| Love this new Forstner bit - it makes easy round holes! |
 |
| This was the trickiest part - holding the glued end piece before nailing |
 |
| Once the first nail went in, it was easier to put the rest in |
 |
| My super precise method of measuring for the handle |
 |
| Measure both ends! |
 |
(Ok - I have to break in here in case you were thinking 'wow, she's so good at this!' I glued and nailed the end pieces on, and thought you put in the handle after that. Well, it was a tight fit and I might have pulled the ends apart a little while forcing nudging the dowel into the hole. Lesson learned - insert dowel into one side before nailing the other end in. Please continue...) |
 |
| Putting the stained box together - see the glue? Just in case nails weren't enough. |
While pounding the nails in, the wood pieces tended to slide around (go figure). Clamps would have helped me, but since I don't have the right ones, I just tapped the nails in while constantly readjusting the wood. After the first nail, it stayed together better.
 |
| A screw on either end of the handle/center piece insured this piece would hold. I also bought a countersink set - this is something I needed 20 years ago! How have I lived this long without one?? |
 |
| Might have sunk this one a little too much - why don't they have measuring marks? I would put one on the bit if I was the inventor of this thing. |
 |
| My totes - cute and easy, and very cheap! |
 |
| My super fancy painting station |
 |
| First coat is a pretty color called Melon by Benjamin Moore - it reminds me of summer! |
 |
| While waiting for the paint to dry, I sorted my nails and screws. What? Doesn't everybody do this? |
 |
| It's a thing of beauty :) No more hen-pecking for a screw. |
 |
| On to the second coat of Creamy by SW |
 |
| Lightly distressed |
 |
| Juxtaposed next to the the non-distressed tote; not loving either look yet. |
 |
| Enter Jacobean stain...hmmm...not liking it, better wipe it off. |
 |
| Well, I went and got the camera to snap a picture. The stain wasn't coming off at all. Uh oh. |
 |
| It looks messy. |
 |
| Too dark. Maybe I should paint it again? |
 |
| How about more sanding? This makes it look aged and weathered - I like! |
 |
| It's almost like you can't tell which came first - the paint or the stain. Happy accidents are fun :) |
 |
| Now to decorate: I printed a fairy off of the internet... |
 |
| Super duper fancy image transfer method - pencil on the back of the image. Just trace around the lines of your picture and the pencil on the back of the image will mark the lines on the wood. |
 |
| Sorry I didn't take a pic of the pencil transfer, but trust me it works well. I used craft paint and paint pens to color in the image and cover the pencil marks. My fairy looks a little insane... |
 |
I ended up just free handing the wording with a paint pen...after figuring out spacing with a piece of paper as a guide.
|
Now how about those other totes? I wanted to label them somehow, but not with a paint pen...
 |
| Now what am I going to do with these?? |
 |
| Starting to see what's happening? |
 |
| Um...'S' hooks didn't go through the wood or the little wood label. Duh. So I went into my organized screws and found these two old slotted screws. What do you know? They fit perfectly! |
It looked too new, so I banged on it for awhile with various hammers and tools, even scraped it along the concrete to give it a 'broken-in' look. Love it rustic!
Cute, right? This is the first time I used blackboard paint and won't be the last!
 |
| I actually took the time to tape and cover... |
 |
| LUV THIS!! |
 |
| Super chunky and sturdy. |
 |
| Le Jonque = Junk :) |
And there you have it. Tool Totes 101 and a bit of painting misadventures. It really is a pretty easy project, and probably would've been even easier if I had measured first...


Way to go! All three are just wonderful and I loved that you sort of made it up as you went along. That's exactly the way I do things, lol!
ReplyDeleteThis tutorial was a riot! Your toolboxes are so cool and I just love how you showed all your 2 steps forward 3 back when things went south. Fabulous tutorial!
ReplyDeleteShared this on FJI Facebook for SNS 84. :)
http://www.facebook.com/pages/Funky-Junk-Interiors/175378011140#!/photo.php?fbid=10150264215516141&set=a.192514281140.164586.175378011140&type=1&theater
Donna
This is wonderful! And you are so talented and creative ~ love the the totes ~ Way to go ~ ^_^
ReplyDeleteGreat job! Loved your post. You made me chuckle a few times. I really liked the way your totes turned out!
ReplyDeleteHave a great weekend!
Holly
Fabuloso!!!
ReplyDeleteYou created as you went along. The door jamb pieces are great as well. Love all three of them!
Just LOVE all 3! You have inspired me to have a go. ;)Sharyne
ReplyDeleteVery inspiring! I would like to make some that look more like yours. So fun!
ReplyDeleteI love that bbq one! :)
ReplyDeleteVery handy and practical. Thank you for sharing the tutorial.
ReplyDeleteMercedes
Oh my goodness, you toolbox Diva! Love them and I need some! I wish I'd been smart when I saw FJ-Donna talking about these on FB! You go girl! I can many uses for these, you've given me good instruction and ideas!
ReplyDeleteThanks,
Debbie
You did awesome! Wasn't it fun to be at Donna's party?
ReplyDeleteI love your organizing too...come on over, have I got projects for you :)
I say "happy accidents" all the time...LOVE THEM!
Hugs from Iowa,
Michelle at Pine Needle Hill
This is so cool! I love it and I'm crazy jealous of your talent with power tools... I'm pretty sure I would have hacked off a major body part in the process! : )
ReplyDeleteyes, I can see you had some of the mis-adventures that I did! your totes are great and I'm jealous that you made 3 of them - so ambitious! Great job with it all!
ReplyDeleteamy of four corners design
Wow Jill - Crazy amazing talent you have! And three toolboxes? You are so inspiring! I'm just starting to learn more about tools - there are lots of saws, drills, metal working equipment and even a spray painting booth at our family business that I never had a clue were there. Thanks for sharing - I'm learning so much from your projects. Keep it up! :)
ReplyDeleteJill! I've been on vaca the last 2.5 weeks, so prepare for the million comments you'll be getting over the next few days!
ReplyDeleteYou rock, this was a fantastic tutorial! They are so cute!
I loooove the really sanded back one! gorgeous! How clever are you!? haha
ReplyDeleteThanks for linking up at Bacon Time. Wow for a first party I can't believe we had over 300 links. Can't wait to see what you share next week. I have a special give away planned just for the linkers at the party. Thanks for adding the link back to the party. I would love it if you would grab the paty button for your collection when you get a chance. I see you are in MI. We are in northern cali but lived in Flint for two years. I miss it sometimes.
ReplyDeleteJill your totes are amazing. Fantastic tutorial - I am having a hard time choosing a favorite as I love all three! Thanks so much for linking to the Sunday Showcase Party. I am a little behind commenting - but I have featured this last week. Hope you are having a wonderful week ~ Stephanie Lynn
ReplyDeleteI love your totes! I just found your site through ArtMuseDog.. and funny... I just put up a post about an antique wooden tote/toolbox I repainted... here's mine :)
ReplyDeletehttp://coriberg.blogspot.com/2011/06/your-own-thing.html
so glad I found you...
All the totes are great, but I love the little fairy tote best! Stain looks great for distressing. Gotta give that a try.
ReplyDeleteAdding you to my Blogs I Love list.
www.theoldblockhouse.blogspot.com
great project - and tutorial. Thanks for posting, I may be brave enough to give this a try :)
ReplyDelete